

If you want to know how to create visual supports for neurodivergent students, the most useful starting point is a single moment in the day when a learner gets stuck. A support built for that moment works much better than a full-day schedule built from a template. This guide follows one support from the first observation through a one-week trial and on to fading it out. It suits autistic, ADHD, dyslexic and other neurodivergent learners, and you do not need a specialist background to follow it.
Start with the moment things fall apart, not the template
Templates are tempting because they look finished. The trouble is that a template answers a question you have not asked yet. Before you open any software or cut any card, spend a few days watching for one specific moment where the learner struggles.
Good candidates are narrow and repeatable: the walk from the door to the desk at the start of the day, packing a bag at the end of the lesson, the switch from a preferred activity to writing, or the middle of a multi-part routine like washing hands. “Mornings are hard” is too wide to design for. “He stands at the coat hooks and doesn’t move on” is something you can build around.

For each moment you spot, jot down three things:
- What happened just before (a transition, a change in the plan, a new instruction)
- What the learner did (froze, wandered, asked the same question repeatedly, started and stopped)
- What happened next (an adult repeated the instruction, the learner was redirected, the moment passed)
Three or four of these notes usually show a pattern. Often the learner is missing information: what comes next, how many things are left, or what the first action is. That is the gap a visual support fills. If you are still working out why a learner finds certain tasks hard, the post on what processing difficulties look like in the classroom can help you read what you are seeing.
Pick the right type of support for the problem
Once you know the moment, match it to the format. There are four common ones, and each solves a different problem.
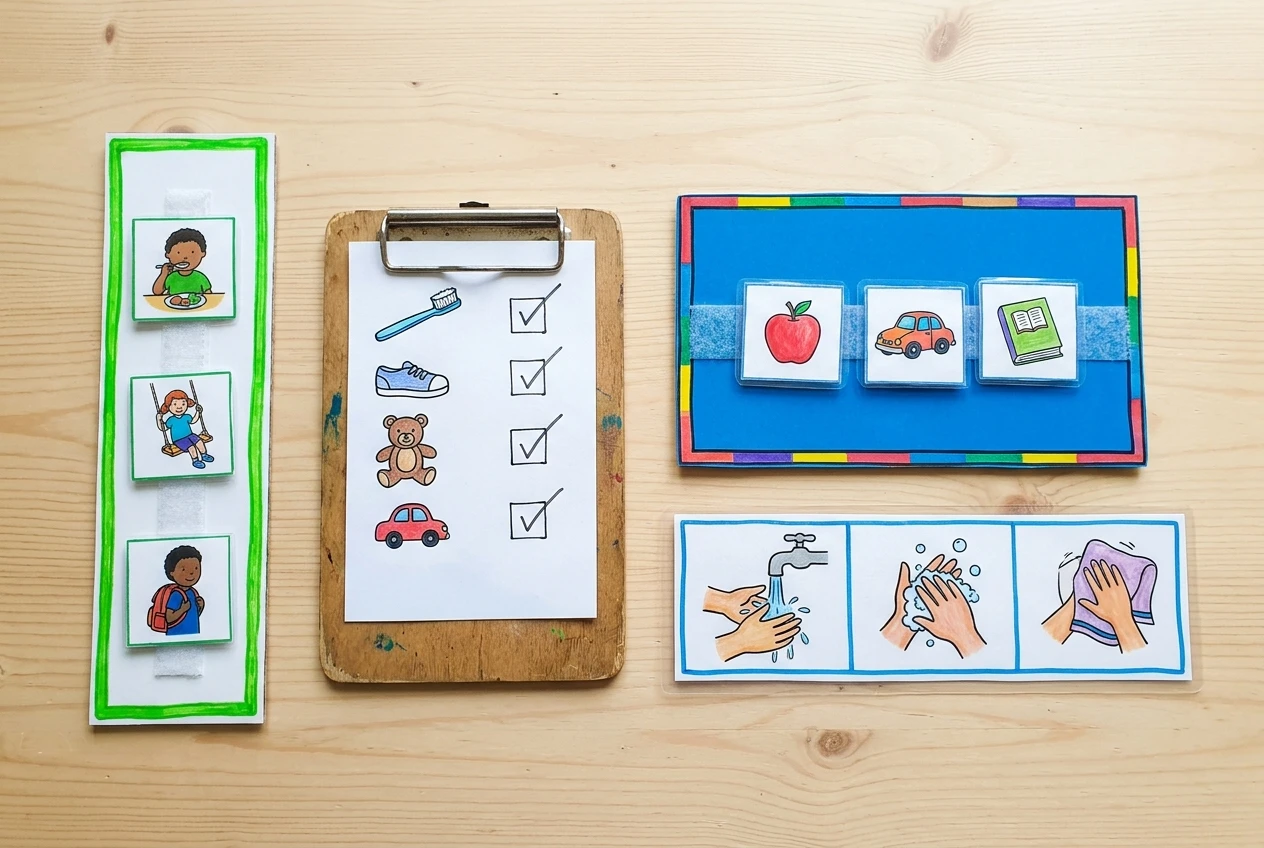
- Visual schedule: Shows what happens and in what order across a block of time, such as a morning or a lesson sequence. Use it when the trouble is unpredictability or moving between activities.
- Checklist: A list of items to complete, ticked off as each is done. Use it when the learner knows how to do each part but forgets one, such as the items for a packed bag.
- Choice board: A small set of options the learner picks from. Use it when open-ended requests cause a freeze, or when the learner needs a way to ask for a break or a different activity.
- Step strip: A short sequence of pictures showing the actions inside one task, in order. Use it when the learner gets lost partway through a routine like getting dressed, starting a worksheet or tidying up.
Test your choice against your notes. If the learner stalls at the coat hooks because they cannot tell what comes after, a two or three item schedule fits. If they stall midway through unpacking, a step strip fits better. If they refuse when told “choose something”, a choice board with three real options removes the guesswork.
Choose one format and one moment. Resist the urge to build a system.
Design it so it can be read in three seconds
A learner who is already stuck or stressed will not study a support. It needs to be understood at a glance, which means every design choice should remove effort.
Images
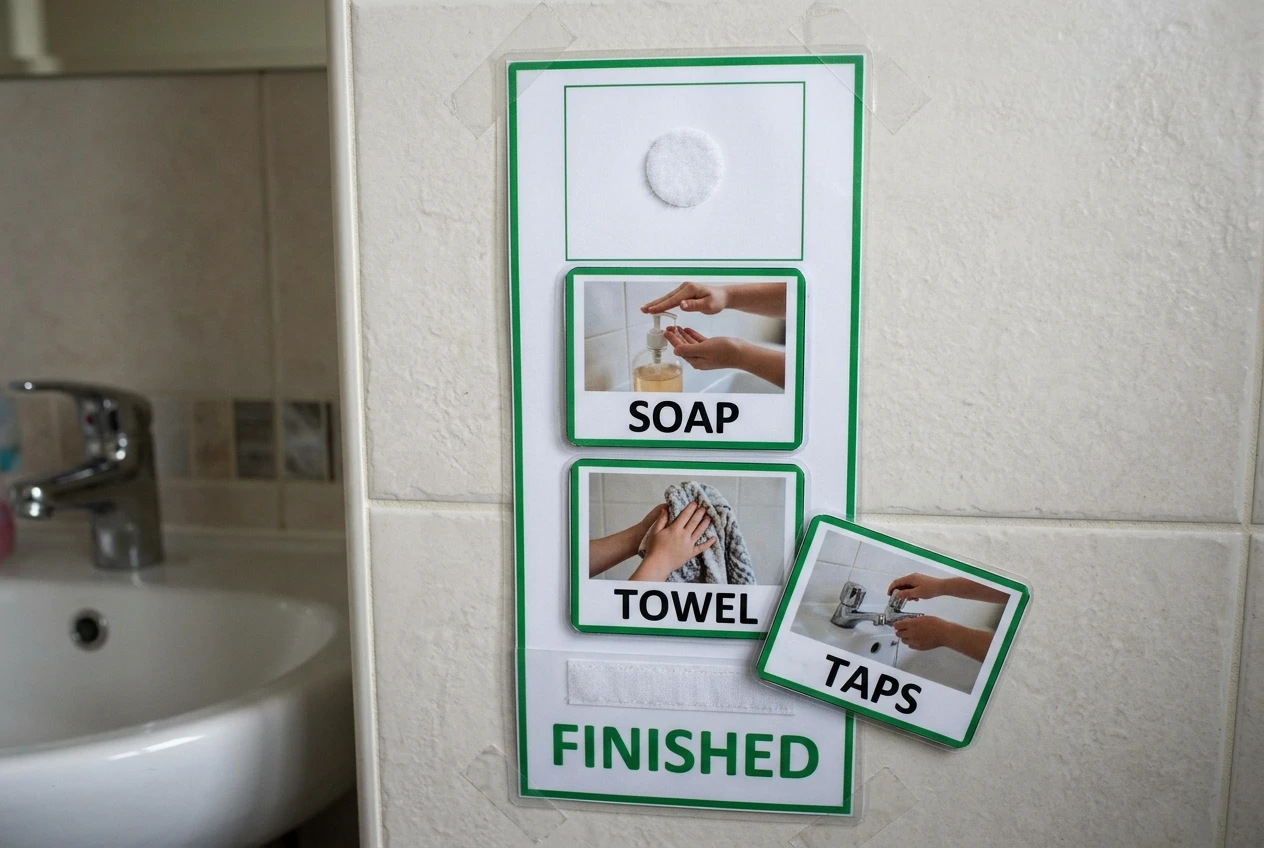
Use one style of image throughout: all photographs, all simple symbols, or all line drawings. Mixing styles makes the learner work out whether different pictures mean different things. Photographs of the learner’s own coat hook, desk or bathroom are often clearer than generic clip art because they match what the learner sees. Symbols suit routines that happen in several places.
Words
Pair each image with a few words, since many learners benefit from the word being right beside the picture, and it helps adults use the same language. Use a plain sans-serif font in a large size, with generous space between lines. Keep wording to a short verb phrase such as “hang coat” or “get pencil”. Dyslexic learners in particular can tire quickly with dense text, so cut anything that does not change what the learner does.
Colour
Use colour to carry meaning, with one meaning per colour. A green border might mean “done” or one colour might mark each subject. Bright, busy backgrounds make a support harder to read and some learners find them uncomfortable, so a white or pale background with dark text is a safe default. Ask the learner whether they like it.
Layout
Lay items out in a single column from top to bottom, or in a single row from left to right, and keep to the same direction every time. Include no more than three to five items, and give each the same amount of space. Add a clear way to mark progress: a tick box, a card that moves to a “finished” pocket, a flip-over, or a piece of Velcro. Marking progress shows the learner how much is left, which is often the missing information.
Finally, place the support where the problem happens, at the learner’s eye level. A beautiful schedule in a folder does nothing at the coat hooks.
Build it with the learner, not for them
A support the learner helped make is more likely to be used. It also tells you things you could not guess, such as which picture makes sense to them and which looks wrong.

Offer choices that are small and real. Show two or three picture styles and let them pick. Ask which words they would use. Let them choose a colour for the border, take the photographs, or add their own drawing. Ask where it should go and how they want to mark an item as done.
Open questions like “what do you want?” can freeze some learners, so give two options instead. If a learner shows no interest in the making, that is fine too. Watch their reaction when you show a draft, and adjust. A learner who turns the support face down or covers it is giving you design feedback.
Introduce it with a one-week trial and a simple way to track what happens
Treat the first week as a trial of the design rather than a test of the learner. If the support does not work, the likeliest cause is the support.
Introduce it at the moment you identified, at the same time each day if possible. On the first two days, walk through it together: point to the first item, do it, mark it off, and move to the next. Use the support to prompt rather than repeating the instruction aloud. Pointing to the picture teaches the learner to look at it. After that, point less and wait longer.
Keep the tracking to one line a day. A small table is enough:
Day Did the moment go as planned? Help needed (none, one reminder, adult help) Note Mon Tue Wed Thu Fri
At the end of the week, look at the pattern in the help column. Are you moving toward “none” or “one reminder”? Does one day stand out, and if so, what was different about it? That answer tells you whether to keep the design, change it or fade it. Decide what to change before the next week starts, and change only one thing at a time so you can see what made the difference.
Fix the common problems: ignored, overused, or too cluttered
The learner ignores it. Check the basics first. Can the learner see it at the moment they need it? Do they understand the pictures? Try pointing to an item and asking what it means. If the support looks babyish to an older learner, a smaller card, a list in a notebook, or a note on a phone or tablet can serve the same purpose with less embarrassment. Also check whether the problem is a missing skill. A step strip cannot help if the learner does not know how to do step two, and that needs teaching first.
It is overused. Some learners start to need it for everything, or adults begin pointing at it all day. A support should cover the moment you chose. If it has crept beyond that, take it back to its original job. It should also never become a way to hold back something the learner wants, like “you can’t have a break until the chart is finished”. It should give information and nothing more.
It is too cluttered. If a learner scans around it without settling, there is too much on it. Cut items, remove decoration, enlarge the pictures, and reduce the words. Splitting one long strip into two shorter ones used at different times often helps more than shrinking everything to fit one page.
Fade it or grow it: knowing when a support has done its job
A support has done its job when the learner completes the moment without looking at it, or glances at it only briefly, for several days in a row. Your tracking sheet will show this: a run of “none” or “one reminder”.
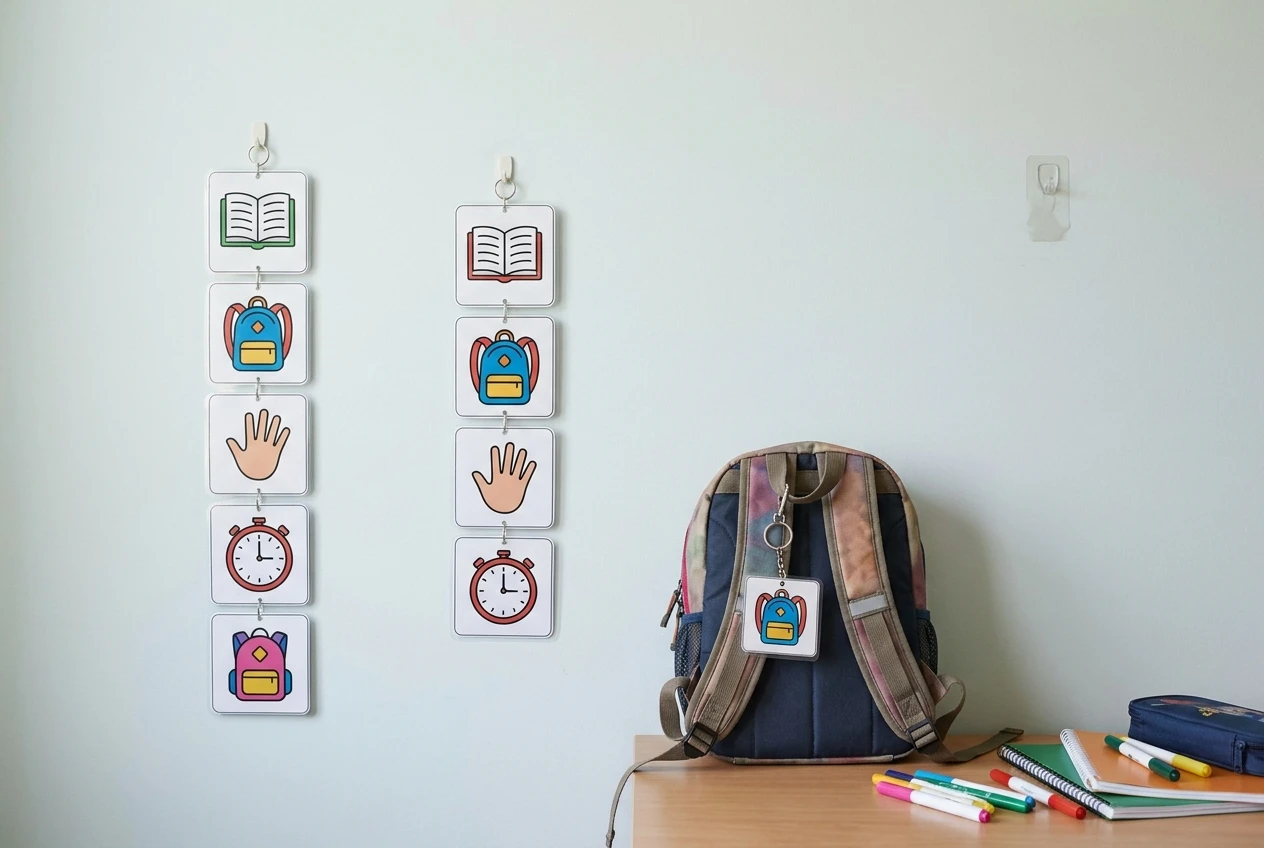
Fade in small stages and watch what happens after each one:
- Remove one item, usually the middle one, so the learner keeps the first and last cue.
- Reduce the size, or move it from the wall to a small card or notebook.
- Keep it nearby but stop pointing to it.
- Take it away for one day a week, then more often.
If the moment starts to fall apart again, go back one stage. That is information about how much support the learner still needs, and is not a failure. Some supports stay permanently, and that is also a reasonable result. The aim is for the support to be as small as it needs to be.
When a support works, it can also grow. You might add a second moment, extend a short schedule across a longer part of the day, or turn a step strip into a checklist the learner uses independently. Go back to observation each time and let the next stuck moment decide what gets built.
Adapt it for home, a classroom, or a homeschool table
The same build process works in each setting. Only the placement and the people involved change.
At home, attach supports to the places where routines happen: the bathroom mirror, the back of the front door, the side of the fridge, the inside of a bedroom cupboard. Photographs of your own home make the pictures easy to read. Make sure everyone who supports the routine uses the same support and the same words.
In a classroom, a strip taped to the learner’s desk or a small card on a ring clipped to their bag keeps support private, which matters for older learners. A whole-class schedule on the board can help many learners at once, but an individual step strip or checklist is for one learner’s specific moment. Tell any other adults who work with the learner, including relief teachers, so the support is used consistently. For routine-based problems, teaching procedures clearly to the whole class can reduce the number of individual supports you need.
At a homeschool table, portability matters because the learning space may change. A schedule made of movable cards lets you reorder the day without remaking it. A checklist on a clipboard or a step strip in a plastic sleeve can travel between the table, the kitchen and the garden. Learners who study at home often value having a say in the order of the day, so a choice board for the order of subjects can work well.
Get help designing a support for your learner
If you would like another pair of eyes on your observation notes, or want to design a visual support for a specific learner with someone who does this regularly, you can book a virtual or in-person support session. We will work from the moment you have identified, choose a format, and build something that fits the learner and the setting.
If you would rather start with something ready to use, the pre-made visual support resources in the shop include supports you can print and adapt, which saves time on the design work while you keep the observation and trial process described here.